Are you tired of paying hefty installation fees for new carpet? DIY carpet installation might seem intimidating, but with the right approach, you’ll save serious money and gain essential home improvement skills. Whether you’re a first-time renovator or a seasoned weekend warrior, this guide will walk you through every critical step. From selecting the perfect tools to honing professional techniques, you’ll uncover how to change your space without breaking the bank. Want to learn how to achieve a flawless carpet installation?
Essential Tools and Materials You’ll Need
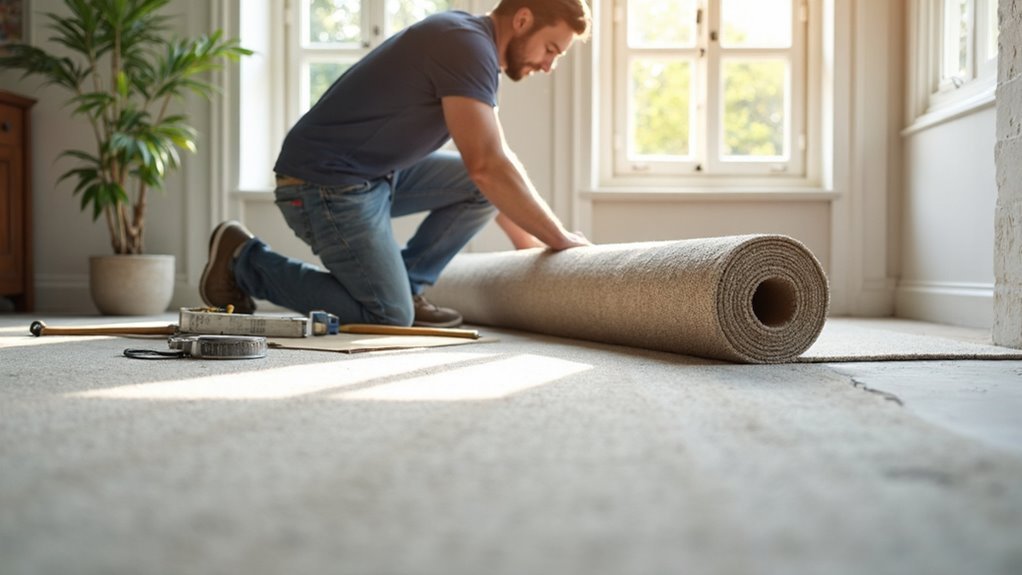
Although carpet installation might seem challenging, you’ll need the right tools to make the job manageable.
You’ll want to gather specific equipment before starting: a utility knife, measuring tape, carpet stretcher, knee kicker, tack strips, hammer, straightedge, chalk line, and safety glasses.
Don’t forget heavy-duty work gloves to protect your hands during installation.
For materials, you’ll require carpet padding, carpet rolls, seam tape, and adhesive. Quality carpet padding provides cushioning and extends your carpet’s lifespan.
Measure your room carefully to determine the exact carpet amount needed, adding 10% extra for cuts and potential mistakes.
Having all tools and materials prepared beforehand will streamline your installation process and help you avoid unnecessary delays or frustrating interruptions.
Measuring and Planning Your Carpet Installation
Precise measurement is the cornerstone of successful carpet installation. You’ll need to carefully measure the room’s length and width, adding 3-4 inches for extra trimming space. Use a metal tape measure for accuracy and sketch a rough floor plan, noting any alcoves, closets, or irregular angles.
Calculate the total square footage by multiplying room dimensions. Always purchase 10% more carpet than your measurements indicate to account for cutting, patterns, and potential mistakes. Consider the carpet’s pile direction and seam placement when planning your layout.
Before purchasing, check the room’s subfloor condition. Verify it’s clean, dry, and level. Remove baseboards and inspect for any damage that might affect carpet installation.
Proper planning prevents costly errors and guarantees a professional-looking result.
Preparing the Subfloor for New Carpet
A properly prepared subfloor forms the critical foundation for a successful carpet installation.
You’ll need to inspect the surface carefully, removing any existing flooring, nails, or debris that could compromise the new carpet’s appearance and durability.
Start by ensuring the subfloor is clean, dry, and structurally sound. Fill any holes or cracks with a leveling compound, and sand down high spots to create a smooth, even surface.
If you’re working with concrete, check for moisture using a calcium chloride test. For wood subfloors, secure any loose boards and replace damaged sections.
Install a high-quality carpet pad that matches your carpet type. The right pad provides cushioning, improves insulation, and extends your carpet’s lifespan.
Removing Old Flooring and Carpet
Removing old flooring demands careful preparation and the right tools for a smooth carpet installation.
You’ll need a utility knife, pry bar, pliers, work gloves, and safety glasses. Start by cutting the existing carpet into manageable strips using your utility knife, then pull them up carefully from the tack strips around the room’s perimeter.
Next, remove the tack strips by inserting the pry bar beneath them and applying steady pressure. Wear protective gear to prevent injury during this process.
If you’re dealing with hardwood or tile, you might need additional specialized tools like a floor scraper or chisel.
After removing the old flooring, thoroughly clean the subfloor, checking for any damage or uneven areas that’ll need repair before laying your new carpet.
Installing Carpet Padding Correctly
Once you’ve cleared the subfloor of old materials, carpet padding becomes your next key step in creating a comfortable, long-lasting floor covering.
Start by choosing high-quality padding that matches your carpet’s weight and intended room usage. Roll the padding out perpendicular to your planned carpet direction, ensuring tight seams without overlapping.
Secure the padding using staples or tackless strips, placing staples every 6-8 inches along the edges. Trim excess padding precisely with a sharp utility knife, leaving no overhanging edges.
Make sure the padding fits snugly against walls and around obstacles like doorways.
Proper padding installation reduces wear, provides better insulation, and enhances your carpet’s overall comfort and performance.
Take your time and do it right.
Cutting and Fitting Carpet Precisely
Precise carpet cutting requires three critical tools: a sharp utility knife, straightedge, and measuring tape.
You’ll want to measure twice and cut once to minimize waste and make certain of a perfect fit. Start by rolling out your carpet in the room, leaving a few extra inches around the edges for trimming.
Use your straightedge as a guide when cutting, positioning it carefully along marked lines. Press the utility knife firmly and make clean, decisive cuts in a single smooth motion. Always cut from the back side of the carpet to prevent fraying and make certain of a cleaner edge.
When fitting carpet around obstacles like doorways or corners, create cardboard templates first to guarantee accurate cuts.
Work slowly and methodically to achieve professional-looking results.
Stretching and Securing Carpet Techniques
Because carpet installation isn’t complete without proper stretching, you’ll need specialized tools and techniques to guarantee a smooth, wrinkle-free surface. A knee kicker and power stretcher are essential for achieving professional results.
You’ll position the knee kicker about 3-4 inches from the wall and push it firmly to stretch the carpet toward the wall’s edge. For thorough stretching, use a power stretcher that spans the room’s width. This tool applies consistent tension, preventing future ripples and bumps.
You’ll want to stretch in multiple directions, ensuring the carpet is taut and secure. Work systematically, moving from one wall to another, and use a carpet trimmer to cut excess material along baseboards.
Proper stretching not only improves appearance but also extends your carpet’s lifespan.
Trimming and Finishing Carpet Edges
After stretching the carpet to create a smooth surface, you’ll need to trim and finish the edges with careful precision.
Use a sharp utility knife and a wall trimmer to cut the excess carpet, guaranteeing a clean, professional look. Hold the wall trimmer against the baseboard and carefully slice along the edge, maintaining a consistent angle.
For corners and tight spaces, you’ll want to make precise cuts that follow the room’s contours. Work slowly and deliberately, using multiple light passes instead of forcing the knife through the carpet.
Once trimmed, use a carpet tucker to neatly fold the edges under the baseboard, creating a seamless shift between the carpet and wall.
Double-check your work to verify no loose threads or uneven edges remain.
Maintenance Tips for Long-Lasting Carpet Installation
5 key maintenance strategies will help you preserve the quality and appearance of your newly installed carpet.
Vacuum regularly, at least twice weekly, to remove dirt and prevent fiber damage. Place doormats at entryways to minimize tracked-in debris and protect your carpet’s surface.
Address spills immediately using appropriate cleaning techniques. Blot liquids with clean white cloths, working from the edges toward the center to prevent stain spreading. Use carpet-specific cleaning solutions matched to your carpet’s material.
Schedule professional deep cleaning annually to remove embedded dirt and restore carpet fibers.
Rotate furniture periodically to prevent permanent indentations and uneven wear. These simple maintenance steps will extend your carpet’s life and keep it looking fresh and lively for years to come.
Conclusion
You’ve now perfected the essential skills for a successful DIY carpet installation. By carefully following each step, you’ve saved money and gained significant home improvement experience. Remember to maintain your new carpet with regular vacuuming and prompt stain treatment. With patience and attention to detail, you’ve changed your space and can take satisfaction in your professional-looking results.